Introduction
Developed based on comprehensive research on user behaviour, swift checkout aims to simplify and streamline the checkout process with a
minimalistic, highly focused and clutter free checkout experience for your customers.
Installation
The installation procedure is very much similar to most other Prestashop modules. No core changes required therefore installation is straight forward, be sure to follow the instructions below to ensure a successful installation.
- Upload the module folder to your stores
{root}/modulesfolder - Once uploaded, login to your Prestashop Back Office and head over to the Modules section
- Search for the module and click Install
- After a successful installation, the module configuration screen is presented to you. More details on this in the next section
Configuration
Open the module configuration and you will be presented with the following configuration options.

Lets take a look at each setting:
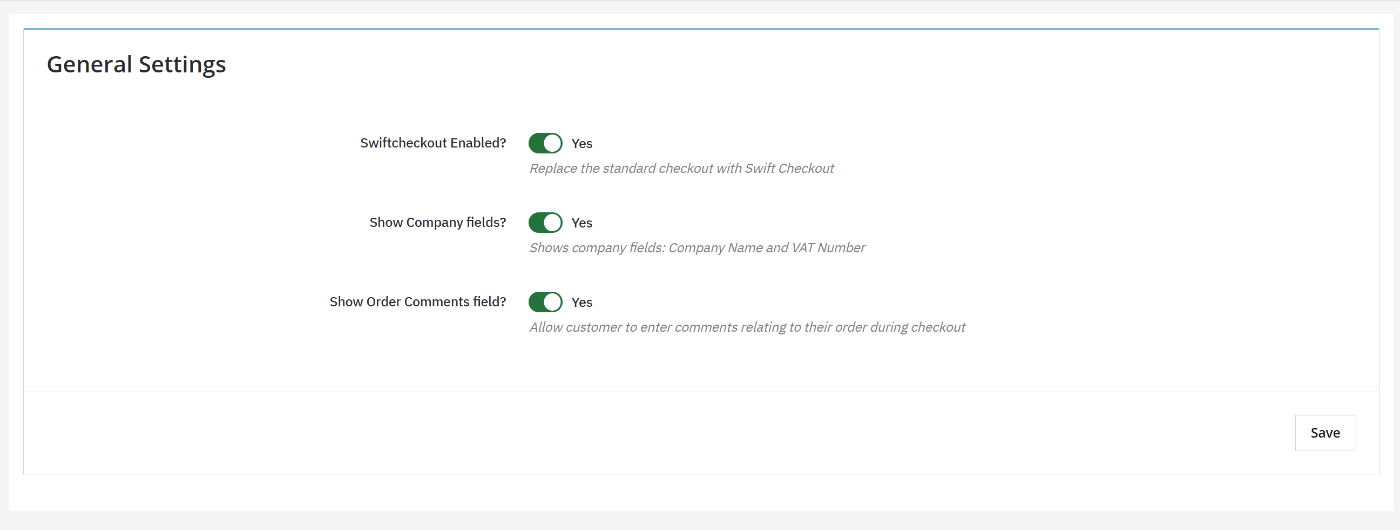
SwiftCheckout Enabled
Choose if the swift checkout process should be enabled and replace the standard Prestashop checkout process.
Show Company Fields
This will allow customers to enter company related information during checkout, namely Company Name and VAT Information.
Show Order Comments fields
Choose if you would to display the order comments fields during checkout. This allows customers to enter additional information related to their order.
As you can see, configuration is straight forward.
The Checkout Experience
After enabling Swift Checkout from the module configuration, your customers will now be guided through a simpler checkout journey. The
journey will depend on the type of customer.
New Customers
New customers to the site will be guided through a 3 step checkout process:
STEP 1
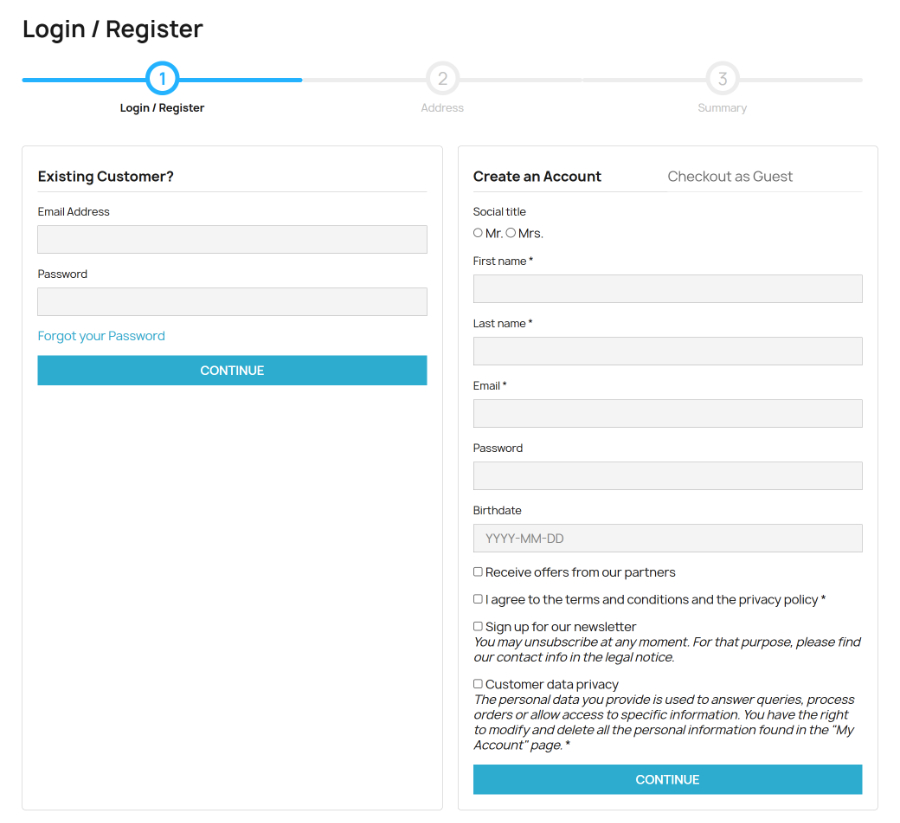
The first step allows the customer to either login or create an account. As a new customer, the customer will create their account and then will
proceed to the next step.
STEP 2
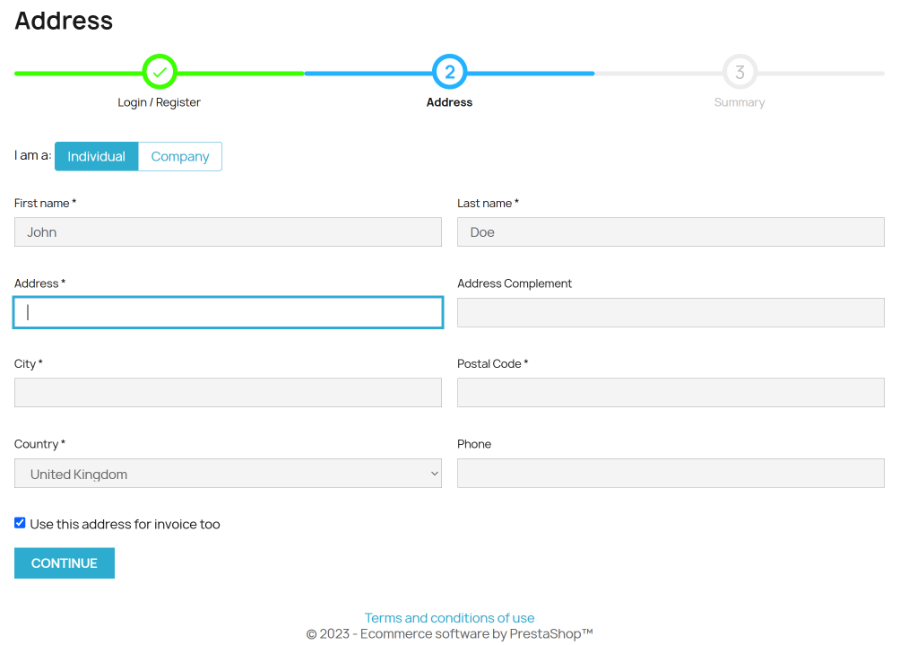
The second step allows the customer to provide their delivery address and invoice address (if it is different from their delivery address).
STEP 3
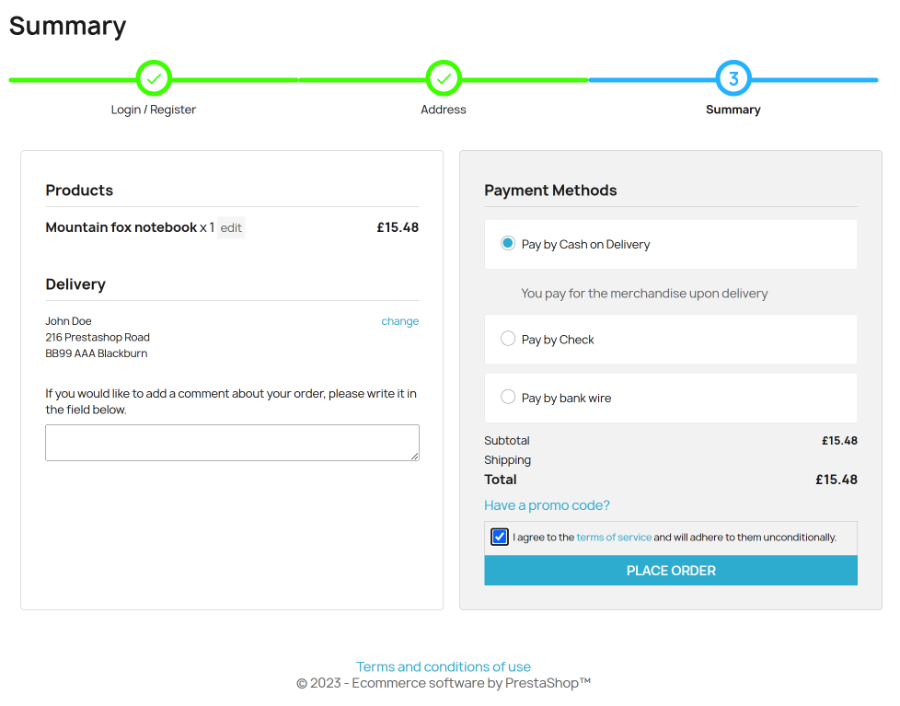
Step 3, the final step allows the customer to review their order details, make any amendments if necessary and choose their delivery and payment options to finalise and submit their order.
Existing Customers
A customer with an existing account, will be redirected to the final step as soon as they login from the first step. However, if they need to amend any details such as their address, they can still do so from the final step.
This concludes the user guide for the Swift Checkout module for Prestashop.
