
Introduction
Product Area Packs for Prestashop 1.7 is a module useful for merchants selling products which are often used to cover or fill an area, such as wallpapers, tiles, carpets, window blinds, grout etc and which are sold in discreet quantities, such as packs, boxes or rolls. The module makes it painless for customers to purchase the quantity of a product they require based on their working area. Customers can simply enter dimensions on the product page and the module will calculate the quantity of product they require.
In this guide, we’ll take a look at installing and configuring the module and exploring it’s options and some more advanced features.
Installation
The installation procedure is very much similar to most other Prestashop modules. No core changes are required therefore installation is straight forward. Be sure to follow the instructions below for a successful installation:
- Upload the module folder to your store’s module folder: {root}/modules/
- After uploading the module, in the Prestashop Back Office, head over the to the Modules section.
- After uploading the module, in the Prestashop Back Office, head over the to the Modules section.
- After a successful installation the module is ready to be used. Initially the module’s main configuration page will be displayed. We’ll take a look on how to use the module below.
Configuring the module

After installing the module, we’re ready to start configuring the global configuration options. Locate the module in the modules list and click the configure link. You will be presented with 3 tabs, namely Dimensions, Options and Translations.
Dimensions
The dimensions tab will list all the dimensions which will be available to display on the product page. You will be able to choose which
dimensions to display from product to product, but under this tab all the dimensions available are displayed.
To add a new dimension press the add new dimension button which will display the following form:

Let’s take a look at the fields in the add dimension form
Internal Name
The name of the field without spaces and hyphens
Display Name
The name of the field which will be displayed on the front end to the customer. If your store is multi-language then a language drop down selector will be displayed next to the field.
Suffix
This is the text displayed after the input field on the product page. This is typically the unit associated with the dimension, for example: cm, m etc. This field can also be localized to multiple languages.
After populating the form, press save to save the dimension and you will be returned back to the dimensions list and the newly created dimension will now be present in the list.
Options Tab
The options tab contains a series of global options which affect some of the behaviour of the module. Lets take a look at the options form in more detail:
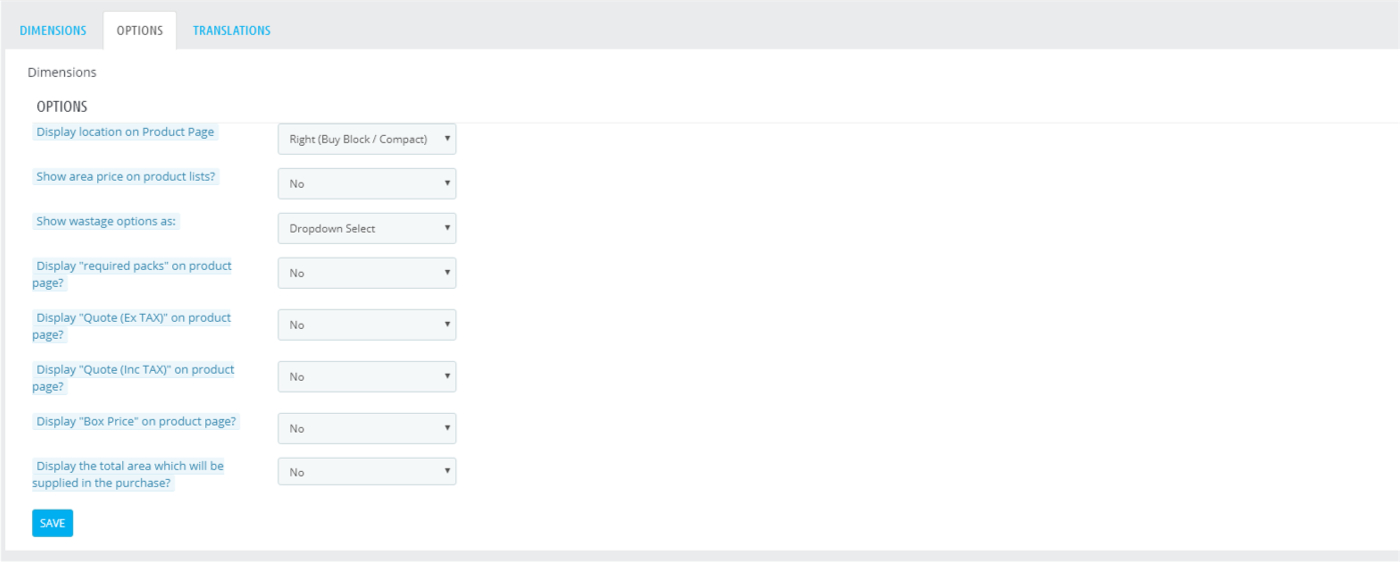
Show area price on the product lists
Enable this option to display the area price in the product lists. We’ll take a look at how to set up an area price later in this guide.
Show wastage options as
If you create wastage options for your products, these can either be displayed for selection by the customer as either radio buttons or a drop down select menu.
Display ‘required packs’ on the product page.
When enabled, a label indicating how many packs / quantities are required will be displayed below the module widget. The number of packs is updated as the customer types in the dimensions of their area.
Display ‘Quote (ex TAX)’ on the product page
When enabled the product total calculated using the quantity of the product required (which is based on the dimensions the customer enters) is displayed on the product page, excluding any taxes.
Display ‘Box Price’
When enabled, this simply displays the price of a single quantity of the product.
Display the total area which will be supplied in the purchase
When enabled, the total area of the product being supplied based on the area the customer enters is displayed here. The total area is the area of a single product quantity multiplied by the quantity the customer will require.
Setting up your Products
After we have finished configuring the global module options, the next step is to start setting up your products. To begin head over to Catalog > Products and edit the product you wish to set up the area packs calculator for and configure the module under the Modules tab from the product edit page.
The first thing you should see is the module settings are divided under two primary tabs, namely : Product Settings and Combinations. Let us first explore the Product Settings tab.
Product Settings
General Options
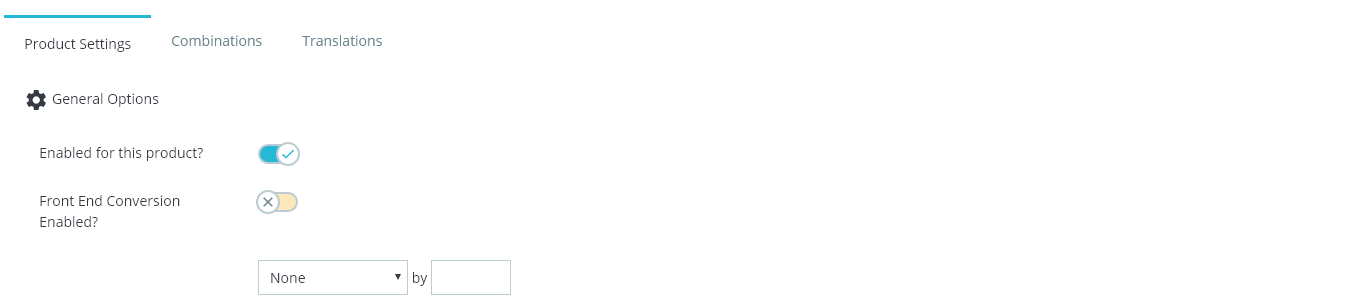
Enabled for this Product
Choose whether or not the product calculator widget should be enabled and displayed on the product page for this product.
Front End Conversions Enabled?
If the area information you will enter for the product (see later) will be in a unit which is different to the units the customer will enter on the product page then you can set up the conversion here. If, for example the area information for the product entered in the back office will be in “m” but you would like the customer to enter in “cm” then you should enable this option and set it to divide by 100. This will convert the “cm” the customer enters into “m” before the module calculates how many quantities they will require.
Fields to display

Under this section you may choose which fields will be visible on the product page. Those fields selected will appear on the product page as text boxes into which the customer may enter their measurements.
Pack setup
Under the Pack Setup section we will provide the module with some basic information about the product to allow it to calculate the quantities required based on the measurements the customer enters.
There are three types of calculations the module is capable of performing; Normal Area Based, Roll / Wallpapers and Paints / Liquids. The formula used to calculate how many product quantities the customer requires differs between these. Let’s take a look at each in more details.
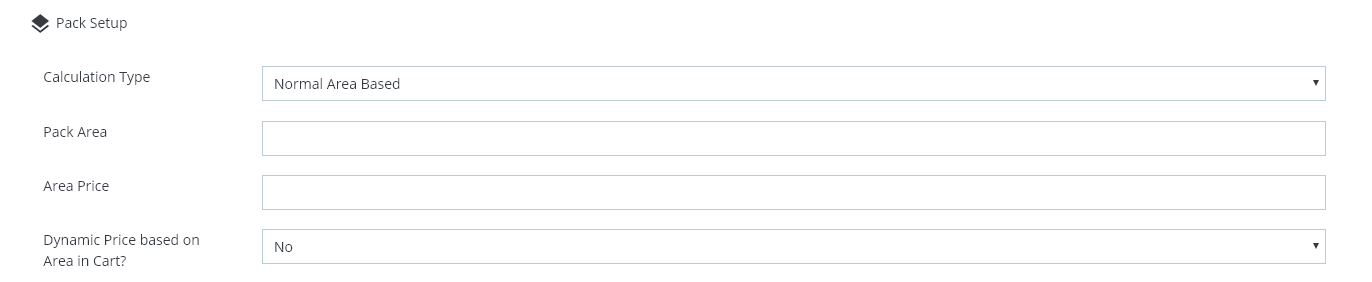
Normal Area Based Calculation
Using this method, you must tell the module how much total area each quantity of the product will cover. For instance, how much area one box of tiles will cover. This will allow the module to calculate how many boxes of tiles the customer requires based on the area the customer enters into the widget.
As an example, let us assume the following:
Pack Area is 5m2. Therefore each box of tiles will cover 5m2 of a wall / floor.
Customer enters the following:
Width: 3m
Height: 3m
Based on the above, the module will perform the following calculation to calculate how many quantities are required:
Qty Required = (Height x Width) / Pack Area
Therefore
Qty Required = (3 x 3) / 5
Qty Required = 1.8
Quantities will always be rounded up, therefore
Qty Required = 2
Dynamic Price based on Area in cart
This option will change the method by which the product tota is calculated during checkout. Instead of charging the customer price per box / quantity, this method will calculate based on total area ordered in the following manner:
dynamic price = (product price x pack area) x quantity required
As an exaple let us assume each pack contains an area coverage of 0.68m2 and the customer orders 37m2. Each pack or quantity of the product is priced at £43.90.
Quantity Required is calculated as described in the previous section:
Quantity required = Total Area / Pack Area
Quantity required = 37 / 0.68
Quantity required = 55
And consequently:
dynamic price = (43.90 x 0.68) x quantity required
dynamic price = (43.90 x 0.68) x 55
dynamic price = £1641.86
Roll / Wallpapers Calculation
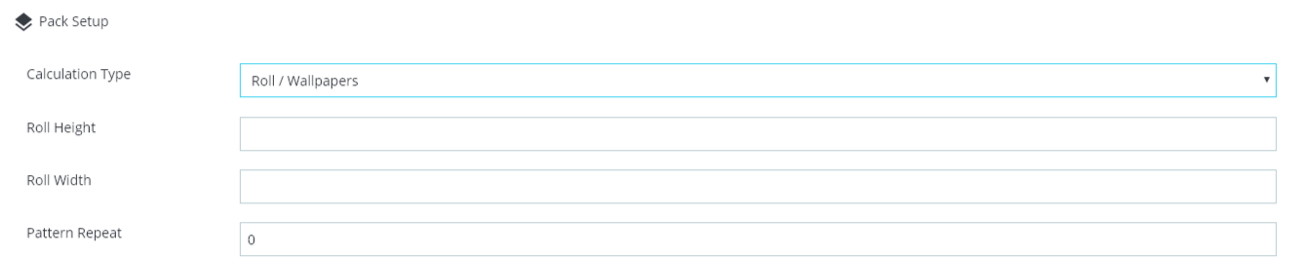
If you are selling wallpapers or similar roll based products, the method of calculating how many rolls are required differs and is not as straight forward as the normal calculation discussed above.
When using this method for calculating quantities, you must enter both the height and width of each roll (Roll Height and Roll Width).
Furthermore you must activate the ‘height’ and ‘width’ fields in the fields displayed list and both must have the internal names, height and width.
Let us assume each roll has a height of 10.5m and a width of 0.53m.
And that the customer will be covering an area of 2m height and 6m height.
The module will calculate how many rolls are required as follows:
First the module will calculate the number of strips required:
Strips required = Width of walls / roll width
Strips required = 6 / 0.53
Strips required = 11.32
Next, the module calculates how many strips in each roll
Strips per roll = Roll Height / Walls Height
Strips per roll = 10.5 / 2m
Strips per roll = 5.25
Using the above, the module can calculate how many rolls are required:
Rolls Required = Strips Required / Strips Per Roll
Rolls Required = 2.15
Finally, this is rounded up:
Rolls Required = 3
Paints / Liquids

Works in a very similar fashion to the Normal Area method. However, the customer will also have the option to select the number of coats required on the product page and add multiple walls to assist the customer with the final quantity calculation.
Area Price
This option is only effective if you have enabled the option show area price in product lists in the main module configuration. Any value you enter into this field will be displayed as the price per m2 in the product lists. This is used for information purposes only and does not influence the calculation of quantities in anyway whatsoever.
You may also enter 0 into this field and the module will calculate the price per m2 automatically using the following calculation:
Area Price = Product Price / Pack Area
Wastage Options
Enter a comma separated list of wastage options into this field and these will be displayed as selectable options on the product page. The customer will then be able to select the amount of wastage they wish to add their calculation as a % before the module calculate how many quantities they require. Example of a value to enter into this field would be 0, 10, 15; this would display the option 0% and 5% and 10% on the product page for the customer to select.
If you are using the Rolls / Wallpaper method, then the wastage options are not displayed as percentages, but normal numbers. The selected wastage option will simply be added to the calculated quantity. For example, this allows the customer to select extra number of rolls required for wastage.
Combinations Setup
Next to the Product Setup tab, you’ll find the Combinations tab. This feature may be useful if the amount of total area covered by each product and the Area Price varies for the different combinations in your product. Use this feature to enter individualised pack information for each of your combinations.
Front End
Now that you have completed setting up the module, the module should be visible on the product page. The information and user interface displayed will depend on the module set up.
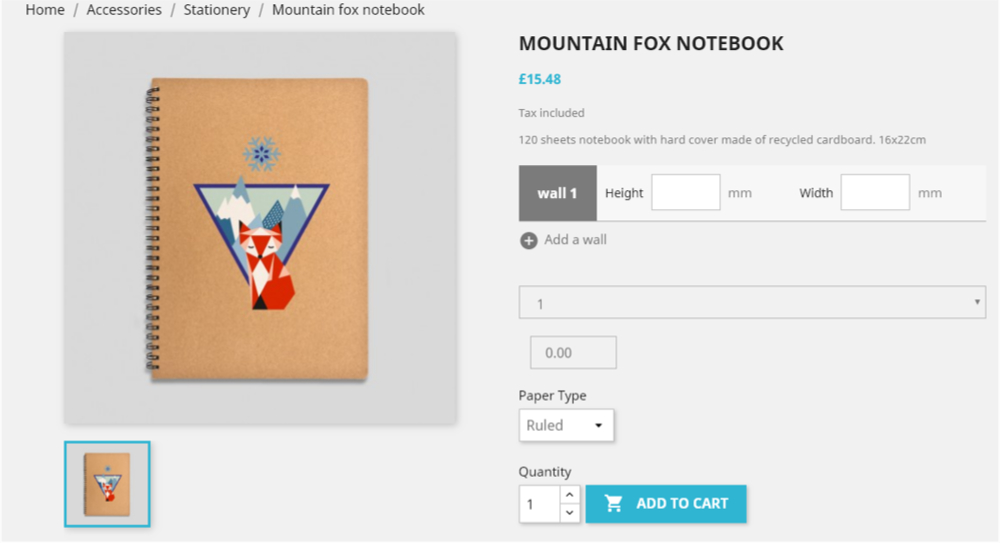
The customer can now enter the area they are purchasing the product for and the module will calculate how many quantities they require and update the quantity field accordingly.