Introduction
Category Fields for Prestashop allows you to display additional content on your category pages in a custom location on your category page, allowing you to add more content to your category pages and therefore help you optimize your SEO campaign on your site.
Installation
The installation procedure is very much similar to most other Prestashop modules. No core changes required therefore installation is straight forward, be sure to follow the instructions below to ensure a successful installation.
- Upload the module folder to your stores
{root}/modulesfolder - Once uploaded, login to your Prestashop Back Office and head over to the Modules section
- Search for the module and click Install
- After a successful installation, the module configuration screen is presented to you. More details on this in the next section.
Configuration

After opening the module configuration you should see the Global Fields tab.
Global Fields
This tab allows you to create, edit and manage global fields for your category pages. Once a global field has been created it will become available in the edit category pages in the back office for each category under Catalog > Categories > edit category.
Note: In most use cases, only one global field needs to be created for your entire catalog. This will then be displayed on your categories pages.
The content for the global field can be set for each category individually when you edit a category in the back office (see later)
By default, the module creates one global field ready for use when you install the module, therefore you probably won’t need to create another
one. This field is displayed below the products on the category pages. You can edit the properties of this hook by clicking the edit icon next to
the hook name.
However, in some situations you may wish to create additional fields, for example, you want to display additional content above the products on
the category pages. You could create a new global field for this. Lets do this by clicking the Add new global field button. You should see the form
below.
[Name]
Supply a name for the field to help you identify it. Try avoid using spaces or special characters,
[Location]
Choose the location (hook) on the category page where the content for this field should be displayed.
[Collapsible]
When enabled, you’ll be able to supply an excerpt (short content version) of the field, as well as full content for each category. The short version
of the field content will be displayed by default on the category pages with a more link which the user can click to see the full content.
When left disabled, the full content of the field will be displayed by default
Category Fields
Once we’re happy with the global fields we’ve setup, we can start populating the content for each category. To start this process, navigate toCatalog > Categories and edit a category. Now when editing a category, you’ll see the global fields available for populating on a per category basis, as shown below:
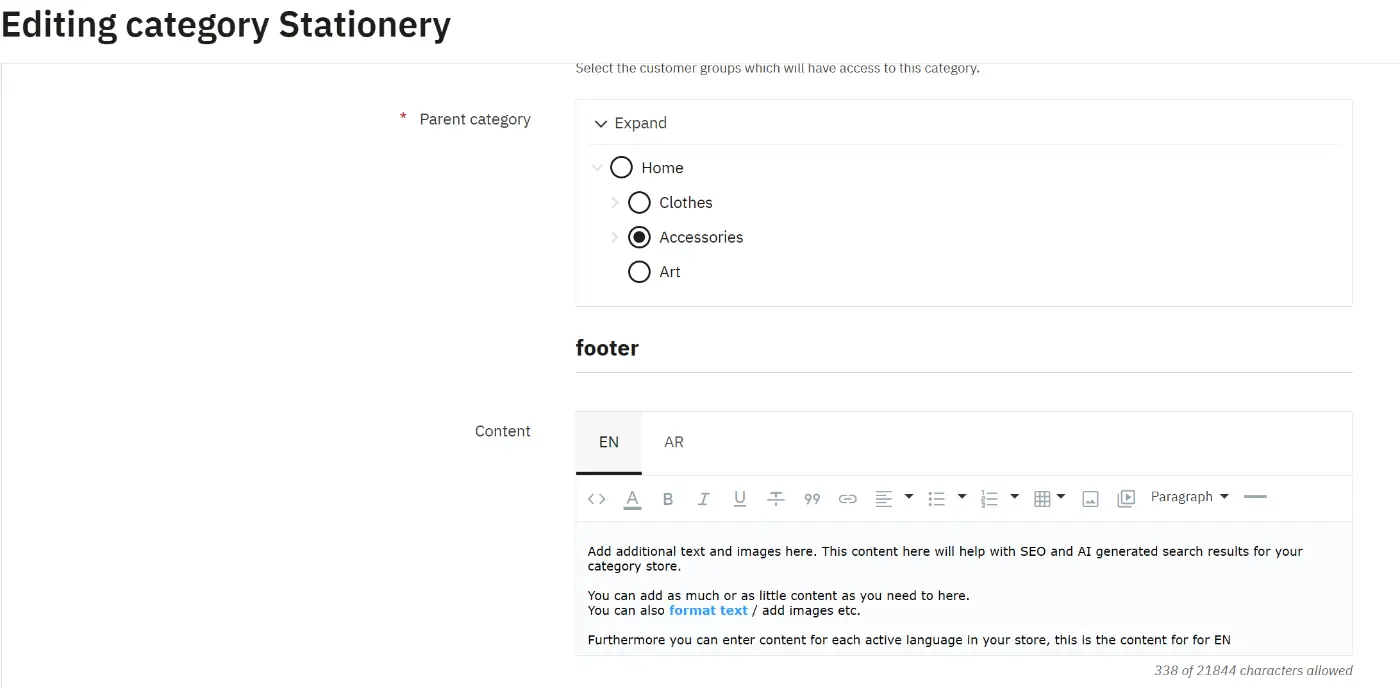
The module supports multi language sites, therefore for each field, you can enter content for each active language in your store.
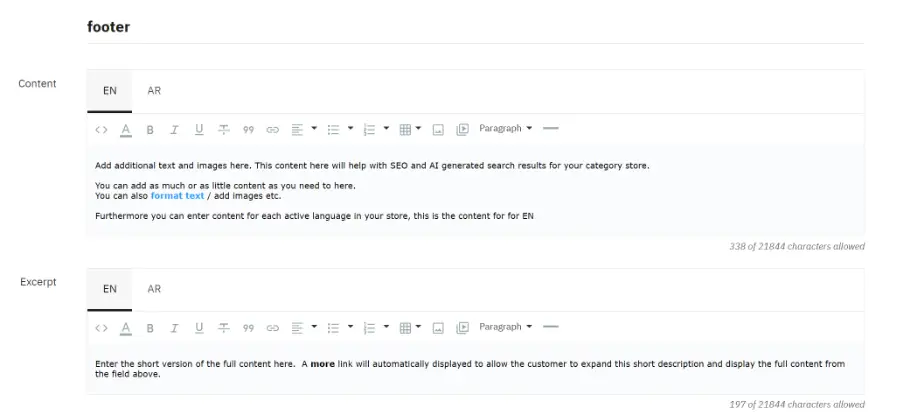
For a field which is collapsible, you will also see the excerpt editor as well as the content, you can popular both.
After entering the content for the category field, save the category. You’ll now see the extra content appear on the relevant category pages in the
store front.
Front End
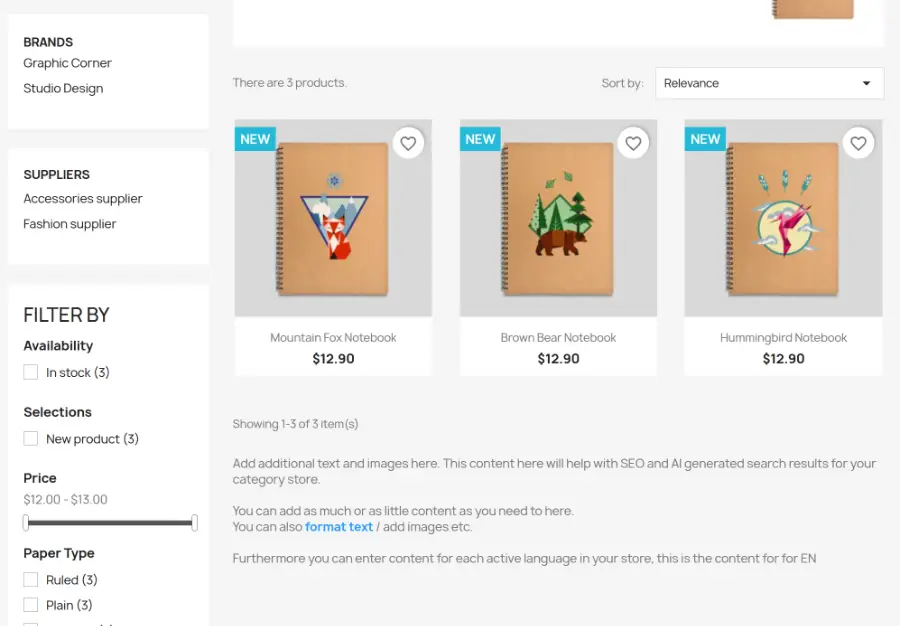
Once you’ve populated the category fields for your categories, the extra content should appear on the category pages in the store front.
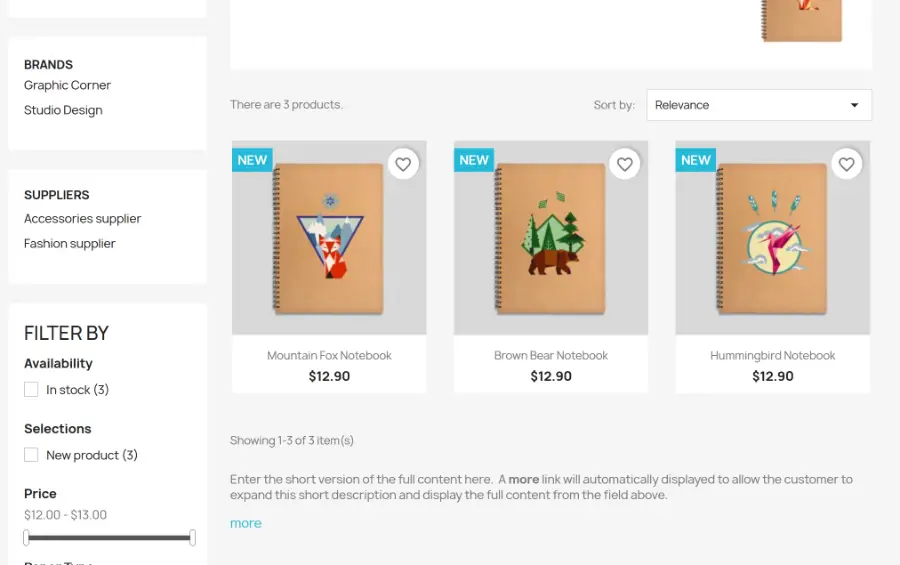
Below is an example of field content being displayed just below the category products:
And below is another example of a collapsible field being displayed on the category page.