
Introduction
Product Custom Options for Prestashop allows you to add priced custom options / attributes to your product pages allowing customers to select from a range of fields you can set up. This module makes it easy to manage such attributes to allow your customers to customise the product they are purchasing and eliminates the need to handle large lists of attribute combinations.
The module allows you to set up the following types of custom options :
- Dropdown select
- Radio Inputs
- Checkboxes with multiselect
- Image options
- File uploads
- Color options
- Date options
- Text entry options
You may add a multiple mix of options to each product.
Installation
The installation procedure is very much similar to most other Prestashop modules. No core changes required therefore installation is straight forward, be sure to follow the instructions below to ensure a successful installation.
- Upload the module folder to your stores
{root}/modulesfolder - Once uploaded, login to your Prestashop Back Office and head over to the Modules section
- Search for the module and click Install
- After a successful installation, the module configuration screen is presented to you. More details on this in the next section.
Configuration

Options Tab
Open the module configuration and you will be presented with the options tab. Here you can create new fields which will be then made available to your products in the back office where you can manage them further. To get started, click the new option button located in the top right hand corner of the screen: 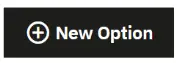
You will now be presented with the following form options:
Internal Name
Internal name for the field, without any punctuations or accented characters.
Option Title
The name of the fields as it will be displayed in the store front on the product pages, checkout pages etc. This is a multi-language field, therefore if your store offers more than one language then you can provide a Display Name for each language.
Option Hint
This will display a information icon next to the option title and the hint will appear when the customer clicks or moves the cursor over the icon.
Option Type
Choose the type of option that will be presented to the customer on the product page. Your options are:
Drop down – A simple drop down list of options from which the customer can select a single option
Checkboxes Multi-select – Display options as checkboxes from which the customer may select a single or multiple options
Radio Inputs – This will display all options as radio inputs from which the customer may select a single option.
Images – Allows you to define an image for your options to provide the customer with a visual representation of each option.
File: Allows you to add file upload fields to your products
Colors – Allows you to define colors for your options which will be presented to the customer as swatches for selection on the product page.
Date – Allows the customer to enter or select a date from a date field (with a pop out calendar)
Textfield – Allows the customer to enter some text into the field which will be added together with the product in the cart
Required
Set this to yes to make the option mandatory on the product page for the customer to select from. The customer will now be able to add the product to the cart if a option value is not selected.
Option Values
After adding a new option, you can start adding option values for the option. For example, if you created an option called Size, you would now start adding option values such as “Small, Medium” etc.
To start adding option values, simply click the add a option value button from he section show below:
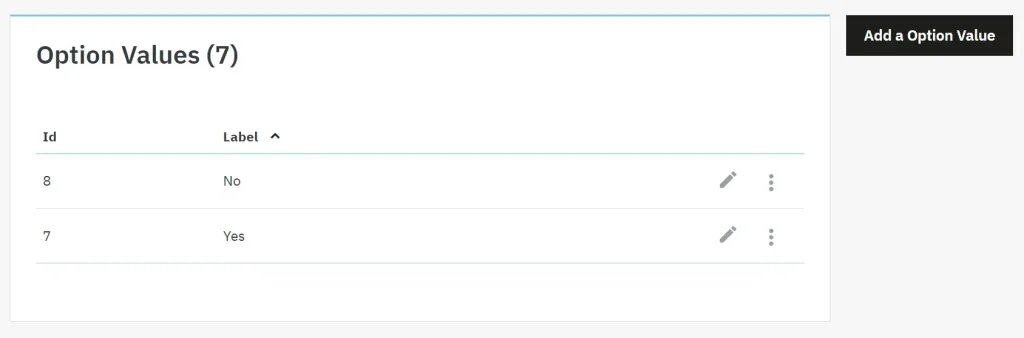
Depending on the type of option you selected in the step earlier, you will be presented with a different set of properties to populate such as the Label or color properties. If you have a multi language store then don’t forget to populate the label property in all languages.
Now that you have created your first option and it’s associated option values you can add additional options which you will use across your products. In the next section we’ll take a look at how we can start assigning these options to individual products in your store.
Steps
Steps allow you to organise options into steps. This will provide a walk through for the customer on the product page, allowing them to navigate and through the steps to help them customize their purchase.
Steps make complex products with many options easier to navigate by presenting options gradually instead of all at once.
To add steps, open the steps tab and then press the New step button from the top right. You can assign options to steps when assing options to products which we shall explore next.
Mass Assign Tab
The mass assign tab allows you to copy the module configuration from one product in your store (we will configure a product later in this user guide) to multiple categories and / or products across your store.
First start by typing in the name of the product you wish to copy the configuration from into the product search field and then select the product which appears in the search results dropdown.
Next, select the category or categories you wish to the copy the configuration across to. If you select a single category you can also select individual products in that category you wish to copy to. Alternatively you can select multiple categories and the settings will be applied to all products in those categories.
Assigning Product Options to Products
Adding options
To start assigning options and option values to products navigate to Catalog > Products and Edit the product in question. Open up the Modules tab and configure the Product Custom Options module as shown below:
You should now see the following:

Ensure that Enabled for Product is set to yes.
Next select the option you wish to add to the product from the Add new a option dropdown. This will create a new group where you can add option values. Click the add a option value button which will reveal option values available for the new option you are adding. You can populate properties such as the price and weight; other properties may also exist for other option types such as images where you can also upload an image to associate with the option value.
The option value entry should look similar to what is shown below:

The Price type property allows you to choose if the impact should be a fixed impact (this will add the option price to the base price of the product) or a percentage based impact (based on the base price)
Click add to commit the change and add additional option values if you need to. You can delete or rearrange the position of both option values and options by dragging the position handle ![]()
Continue to add additional options and option values as described until you satisfied, after which you should press the Save changes button to permanently save the options you have assigned.
Steps
If you wish to organise options into steps, then add a step from thew left hand panel. This will then appear on the options stage. From here you
can add options to different steps by simply dragging them onto the appropriate step.
Conditional Options and steps
The conditional options feature allows you to hide an entire step, entire options or specific option values when certain option values are selected by the customer. Some examples of how conditions can be used are:
- When customer selects a small size, hide the color blue under the color option.
- When customer selects a small size, hide all color options.
- When customer selects a small size or a medium size, hide Step 3.
- etc
Each step, or options has the following icon: ![]() Cliking it will display the following popup:
Cliking it will display the following popup:
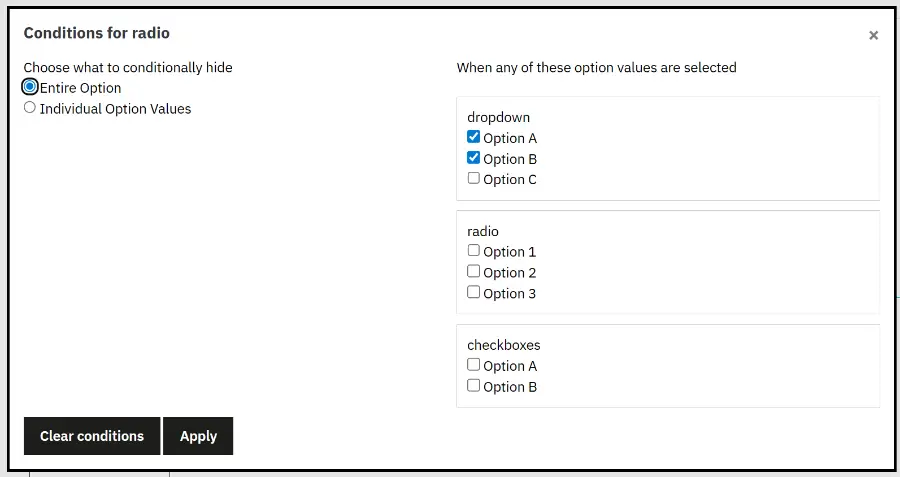
Left hand side
The left hand side allows you to select whether the entire option you are configuring will be hidden or specific option values within the option; when the conditions are satisfied.
Right Hand Side
The right hand side allows you to choose when the option or option values selected on the left hand side will be hidden. If the customer selects any of the option values you select on the right hand side, then the options / option values on the left hand side will be hidden for the option you are configuring.
Front End
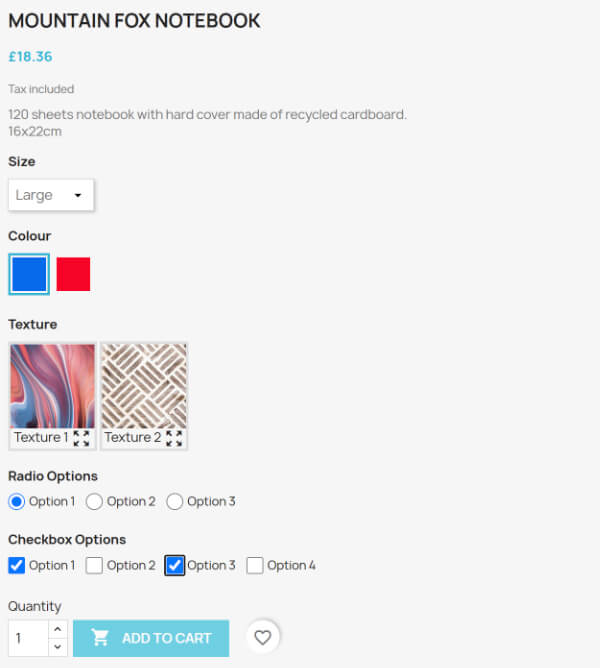
After you have finished assigning options and option values to your products, they should be visible on the product page for the customer to select before they purchase an item:
The options will also be displayed in the customer shopping cart and you’ll be able to see the options selected from the back office when the customer places their order.